How to Install the AD Pro Toolkit
Installation Steps
To AD Pro Toolkit installer is provided as an msi file. Follow the steps below to install the software.
-
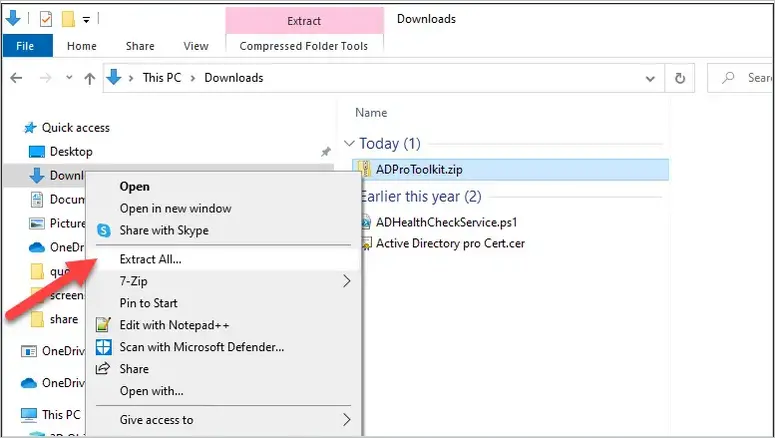
Right-click the ADProToolkit.zip file and select “Extract All”.
-
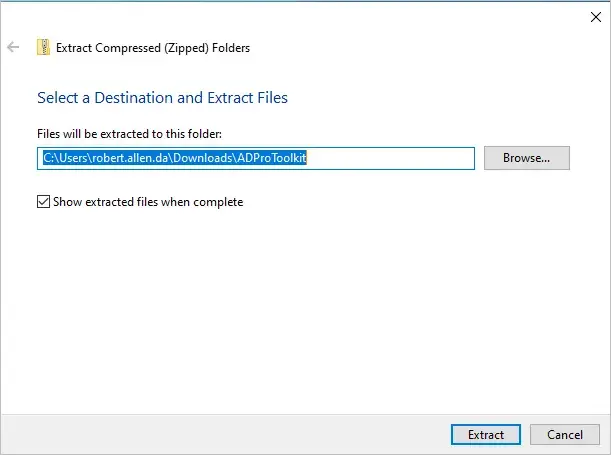
Select a destination to extract the files. You can keep the default or change it to another folder.
-
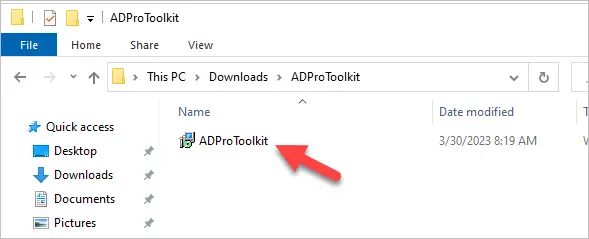
From the extracted folder double click the ADProToolkit.msi to start the installation.
-
Click “Next” on the welcome screen.
-
Accept the end user license agreement and click “Next”.
-
Select the Installation folder and click “Next”. It is recommended to leave it at the default install path (C:\Program Files\ActiveDirectoryPro\AD Pro Toolkit).
-
Click “Install” on the ready screen to start the install.
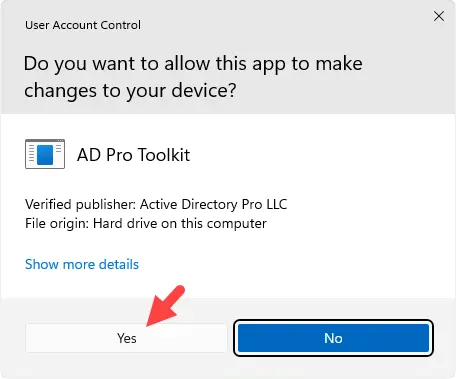
You might get prompted by Windows User Account Control. Click Yes on this popup. Our software is digitally signed and is a verified publisher.
When the installation is completed click “Finish”.
That completes the installation process.
An icon will be added to the desktop for quick access.